The 10 Best Mac tips, tricks and timesavers
Bet you didn't know your Mac could do all this
With the launch of macOS High Sierra swiftly approaching and tons of discounts on MacBooks and other Apple products available to students, you may be one of many users making the switch to Mac. Whether you’re coming from Windows or Linux, or this is your first computer altogether, we’re here to help you get started.
1. Do unit conversions in Spotlight

As well as being able to do calculations in Spotlight, in Yosemite it gets an extra trick: unit conversions. You can do specific unit conversions if you need to – "13 stone in lbs", say – but it's also intelligent enough that in many cases if you just give it the amount and unit you want to convert, it will suggest not just the likely conversion but also plenty of alternates.
Type in '$1299' and you'll immediately be told what that is in Sterling (based presumably on what's set as your native currency in the Language & Region pane of System Preferences), and then when the window folds down to show more results, you'll see Euros, Yen and so on.
2. Talk to and listen to your Mac!
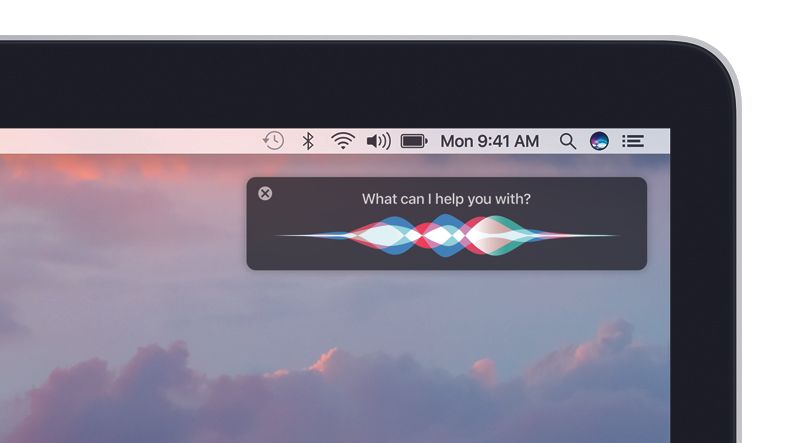
Before macOS Sierra, the Mac's ability to listen to you as well as talk was already really impressive with its Dictation tool. But now, that's been blown out of the water by Siri's long-awaited arrival on Apple's desktops and laptops.
By either pressing and holding the Command and Space or clicking the icon on your Dock or Menu Bar, you can summon the same Siri you've grown accustomed to on your iPhone. However, this version of Siri is, in ways, much more powerful.
Beyond the standard query that might give you the weather or who's up in the in playoff game, Siri on macOS Sierra can toggle system functions like Wi-Fi or Bluetooth or even pull up individuals files stored on your system based on what you tell Siri about the file.
Siri can even launch or close apps for you as well as store the results of your queries inside the Notifications area of the OS for later use. Just press Command+Space and get to asking.
3. Take screenshots of any size

For Windows users, taking screenshots can be a chore. You can either use the PrtSc key to capture the entirety of your display or use the Snipping Tool to snatch but a portion. Of course, some keyboards aren’t compatible with the shortcut and opening a separate app to take a screenshot is a bit of a hassle. Luckily, on a Mac, the process is streamlined.
Simply put, to take a picture of your entire screen, press Shift, Command and 3 at the same time; the screenshot will then be stored on your desktop. For a portion of the screen, the shortcut is Shift-Command-4 with the same output directory. To only capture an individual window, you can press Shift-Command-4, hit the spacebar, then click the window you’re trying to capture.
Lastly, if you have a fancy new MacBook Pro featuring the Touch Bar, press Shift-Command-6 to take a snapshot of that little OLED strip. No matter the case, taking a screenshot on a Mac requires nothing more than memorizing a few different keystroke combos.
4. Type exotic characters
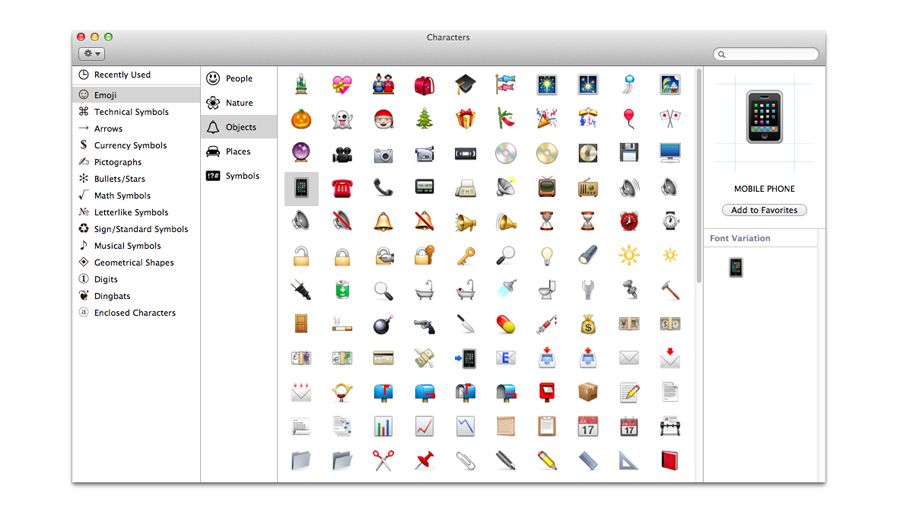
As well as letters and symbols you see on your keyboard, you can type a bewildering array of special characters. You may already be familiar with typing accents such as for café (in that case you either type Option+E then E again or, on OS X 10.7 or later, hold down the E until you get extra options) but you'll find there are many more.
Go to the Edit menu of most apps and you'll see Special Characters at the bottom. This panel gives you access to a huge range of symbols you can drag into your documents. Not all apps or operating systems support them, but these are mostly part of the cross-platform Unicode standard. There are probably more than you see at first, too; click the cog to reveal more.
Emoji (those fun, colourful characters available in OS X 10.7 or later) are a notable exception to this cross-platform world. They're not Apple-only, but your recipient might not be able to see them.
5 Sign PDFs right in Mail

It might be the 21st century, but we're still using squiggles on a piece of paper to agree to all manner of things. If you are emailed a PDF to sign, though, you don't have to faff about printing it, signing it, then scanning it back in: you can actually sign it right in Mail.
Drag a PDF into the email you're sending, hover over it then at the top right you'll see a little button appear; click it, and you get a range of Markup options, including one for signing documents. Best of all, you can either add your signature by holding a signed piece of paper up to the webcam on your Mac – and it does a great job of cutting it out of the background – or by drawing on your trackpad.
Got an iPad stylus? Try using that instead of your finger!
6. Share your passwords and credit card details
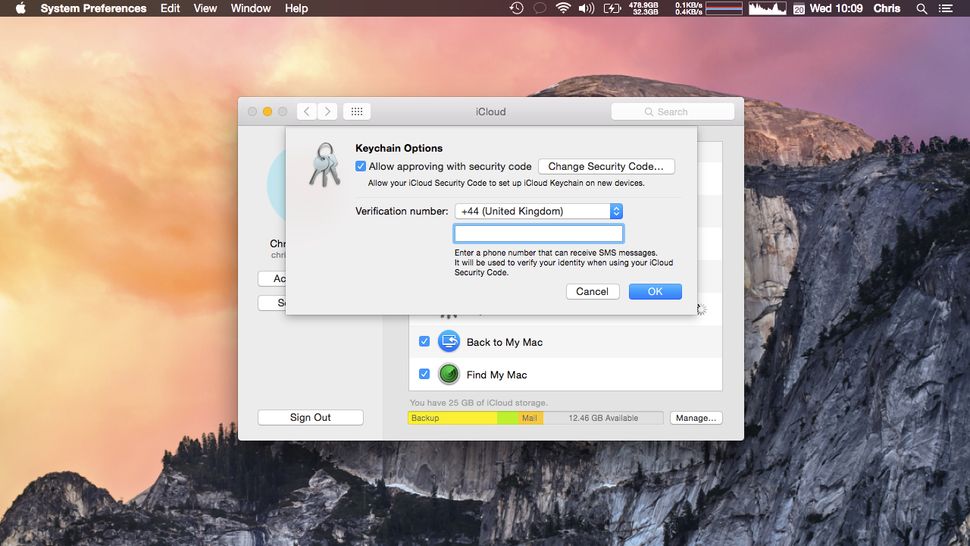
If you have more than one Apple device – whether that's a work and a home Mac, a Mac and an iPhone, or a couple of iOS devices – then it's worth turning on iCloud Keychain. This lets you keep your Safari website usernames and passwords, credit card information, and Wi-Fi network information in sync across all your devices.
This is so that, for example, you can quickly log into a website on your Mac having saved a password on your iPad, or enter your secure credit card details automatically on an iPhone having saved them on your Mac. It's a slightly complex setup, but worth a bit of pain up-front to make your life easier later on; start at this page on Apple's website to find out how.
7. Make a keyboard shortcut for anything
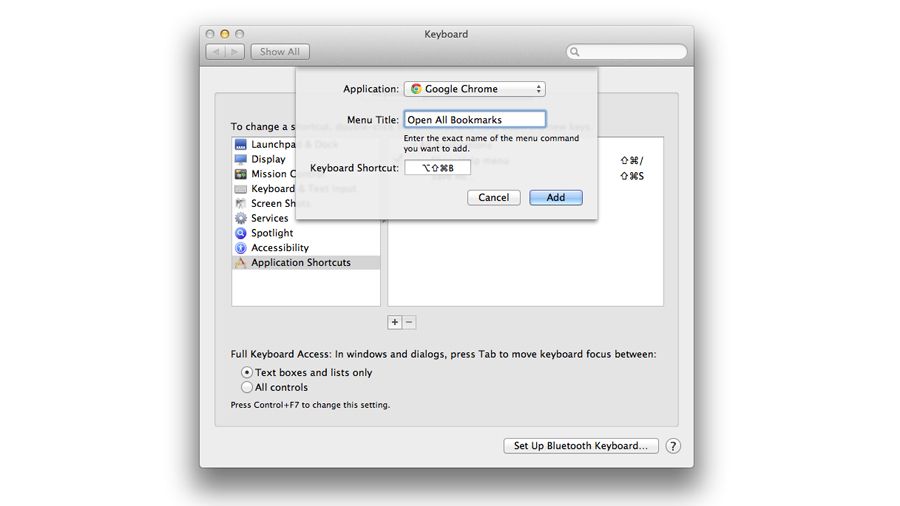
Keyboard shortcuts are great for saving time, but you're not limited to just the shortcuts put in by developers; if there's a particular menu option you use all the time that doesn't have a shortcut, you can create it yourself.
Go to System Preferences > Keyboard > Application Shortcuts. Click the + button to add a new shortcut. You can choose which app you want to apply it to from the drop-down list, but you must know the exact name of the menu command to type into the next box, including the correct case and any special characters such as ellipses. Lastly, choose a unique key combination to invoke the command, then click Add.
8. View someone's screen remotely
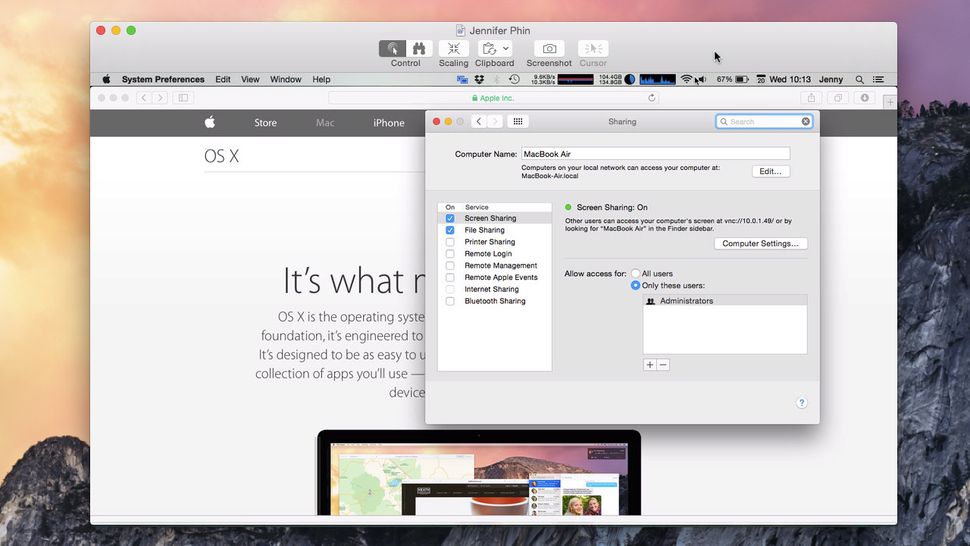
One really easy way to view someone else's screen or even control their Mac over the internet – which is invaluable if you're helping troubleshoot a relative's computer problems – is to launch Screen Sharing by searching for it with Spotlight then entering the Apple ID of the person you're trying to contact. (If you or they don't know it, just have them look in the iCloud pane of System Preferences. And while they're there, make sure Screen Sharing is enabled in the Sharing pane of System Preferences.)
They'll be asked to grant you permission to view their screen, and they can also then click on the screen sharing icon in the menu bar and grant you the ability to virtually, remotely control their mouse and keyboard too.
9. Use your Mac as a wireless hotspot
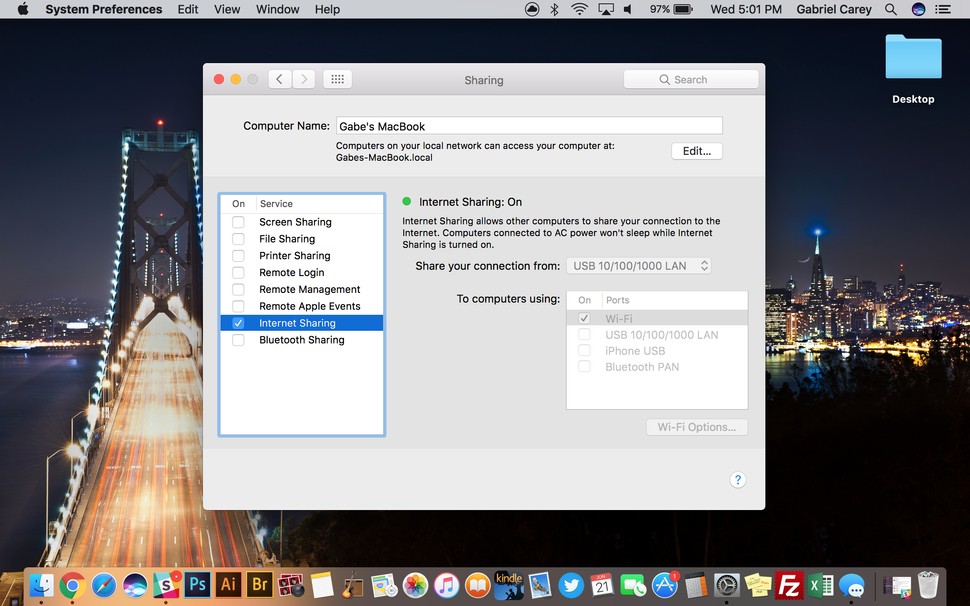
Not only can you use the Sharing setting to share your screen remotely, but you can also use it to share your network connection with others in the same location. Assuming your Mac is connected via Ethernet, the Internet Sharing feature in macOS is a solid temporary fix for any household lacking a wireless router.
For it to work, all you have to do is head into Settings then Sharing then navigate to the “Share your connection from:” dropdown box. From there, you can choose the source of the network connection you’re looking to share. Then pick “To computers using Wi-Fi” within that respective menu. For more info on this, head here to Apple’s support site.
10. Restrict what someone can do - and when!

The Parental Controls in OS X are simple, but there are plenty of options in there – some of which are useful for other things than preventing underage access. You can limit computer use to a certain length of time every day, set a 'bedtime' after which users won't be able to use the computer, limit the functions of the Finder, limit what apps that user can use and more.
You could, for example, disallow a nervous computer user from modifying the Dock or changing their password.
The 10 Best Mac tips, tricks and timesavers
![The 10 Best Mac tips, tricks and timesavers]() Reviewed by saiyadnauman
on
08:31:00
Rating:
Reviewed by saiyadnauman
on
08:31:00
Rating:


No comments: